Transforming a Lenovo N22 Chromebook Into a Full Linux Laptop
In this post I will be going over the steps required to turn a stock Lenovo N22 Chromebook into a full linux Laptop. Unlike the majority of Chromebook Linux tutorials, this will not be along side the existing operating system. This will completely remove the existing OS from the device.
This post will cover how to disable the existing software security and hardware security that is present on the device. Then cover how to replace the existing BIOS, making it possible to boot and install alternative operating systems on the device.
Disclaimer
If something goes wrong during this process it can and likely will brick your device These instructions are for the Lenovo N22 Chromebook, attempting them on a different computer may have undesired side effects. Continue at your own risk.
Tools
For this task you will need the following things:
- Chromebook Laptop
- Phillips Head Screwdriver
- Plastic or Metal Spudger
- Empty USB Stick
I found that it is useful to have multiple spudgers, since opening up the laptop can be a bit of a tedious task.
Backup
As previously stated, this process will delete everything that is on your laptop. It is a good idea to backup any existing data beforehand. That being said, if you purchased this laptop to use as a linux device, you probably dont have any data to backup in the first place.
Enable Developer Mode
The first thing that needs to be done is to enable developer mode. This will allow us to replace the operating system and change the bios.
Turn on the laptop and make sure that you have connected to the internet. The connection is important because developer mode will download and reinstall the Chrome OS once it is enabled.
Press and hold the Esc and Refresh keys, then press the power key while still holding the other two. This will shut down the pc and boot into a recovery mode screen. At this point you may see an error claiming that your operating system has been corrupted. This is normal and can be ignored.
Once you are in recovery mode, press Ctrl+D this will bring up a prompt to enable developer mode. Enable it, then wait. After a short while the Chromebook will beep twice at you, then it will reinstall the OS and finally boot normally.
At this point you should be in developer mode. From now on, every time that you boot the computer you will see a developer mode warning and it will beep before booting. This will be removed later once we install the new BIOS.
Remove Security Screw
Now that developer mode is enabled, we have to remove a security screw from the motherboard of the computer. This screw is completing a circuit that prevents us from making changes to the BIOS chip. At this point you should power down the computer.
There are 10 screws holding the N22 together. Using the phillips head driver, remove all of the screws. The first 6 are visible from beneath the laptop, the remaining 4 are located under the small rubber feet. These feet are glued down and can easily be pried off. Put the screws and feet in a safe place for later use once they have been removed.
Now we need to remove the keyboard, this will give us access to the motherboard. Flip the laptop upright and make sure that it stays turned off. Then using the spudger, gently pry the case open until you can lift the keyboard section full off of the device. Make sure that you do not unplug the ribbon cables that connect the keyboard and mouse to the motherboard.
Looking at the motherboard, the security screw is located on the bottom left of the motherboard. It is directly to the left of the keyboard ribbon cable connector. It is likely hidden under a small while and blue Lenovo sticker. If you are using a different laptop model, this location will probably be different. Once found, remove this screw.
Board From Above
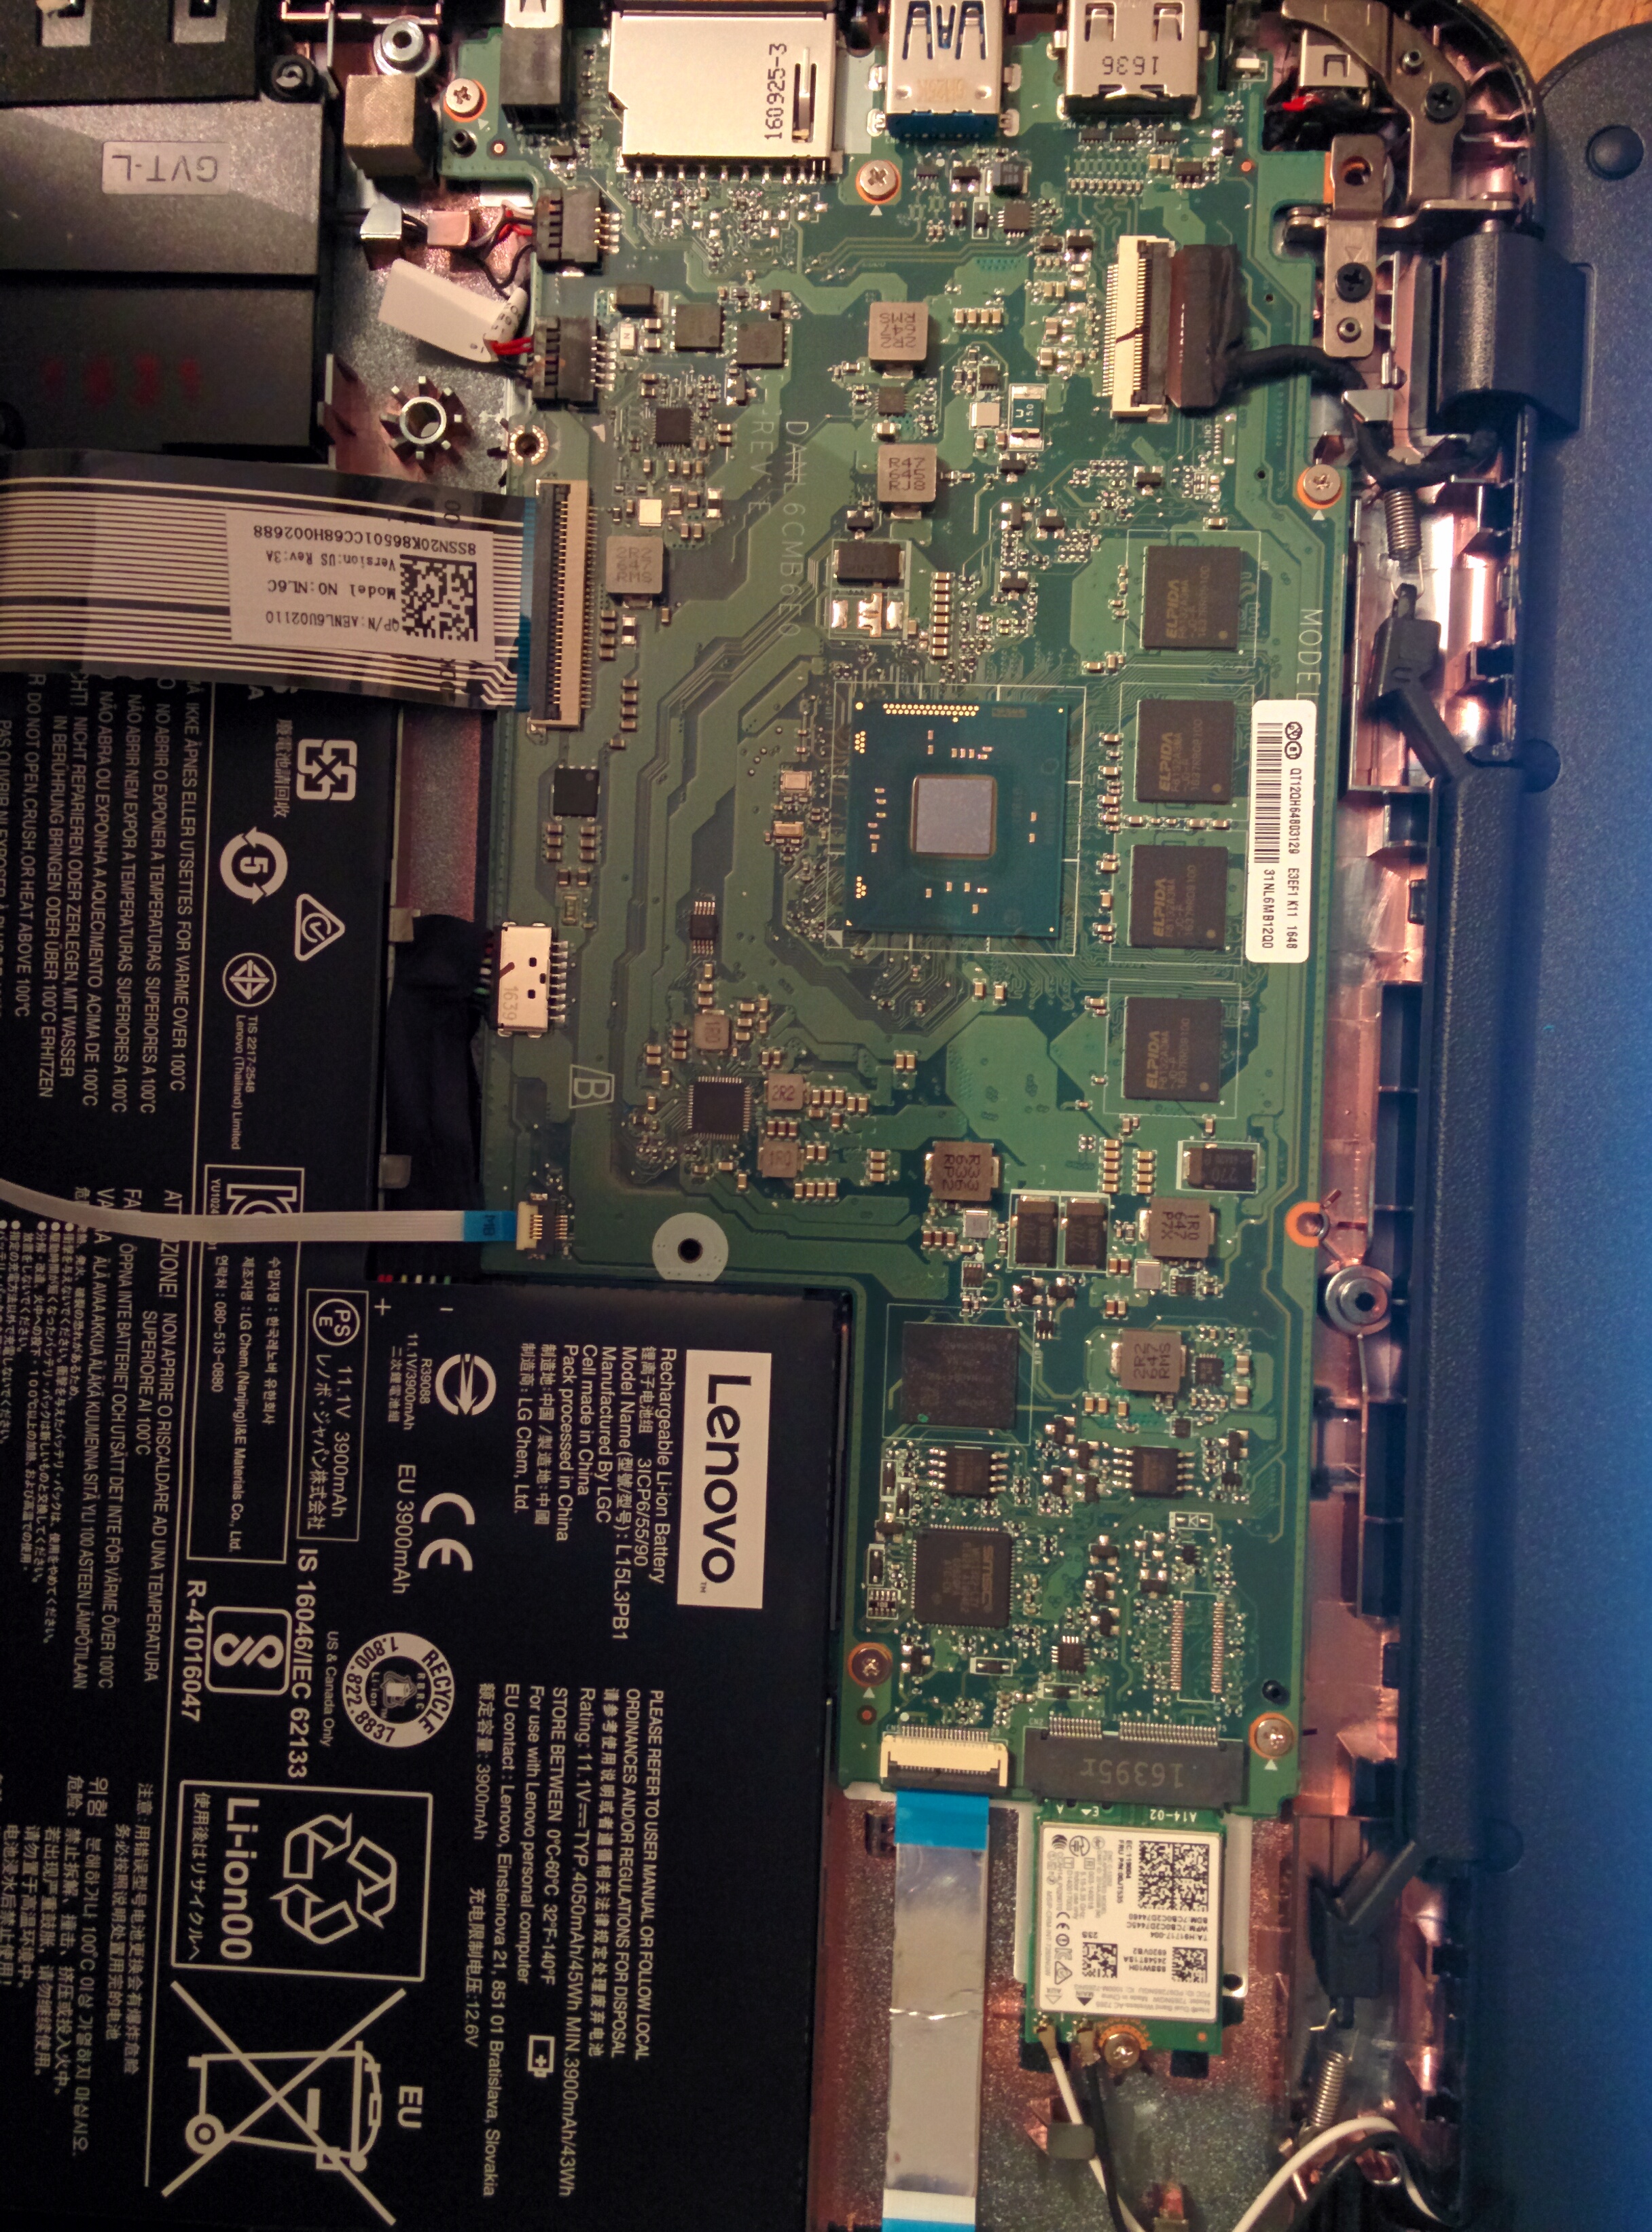
Security Screw Hole
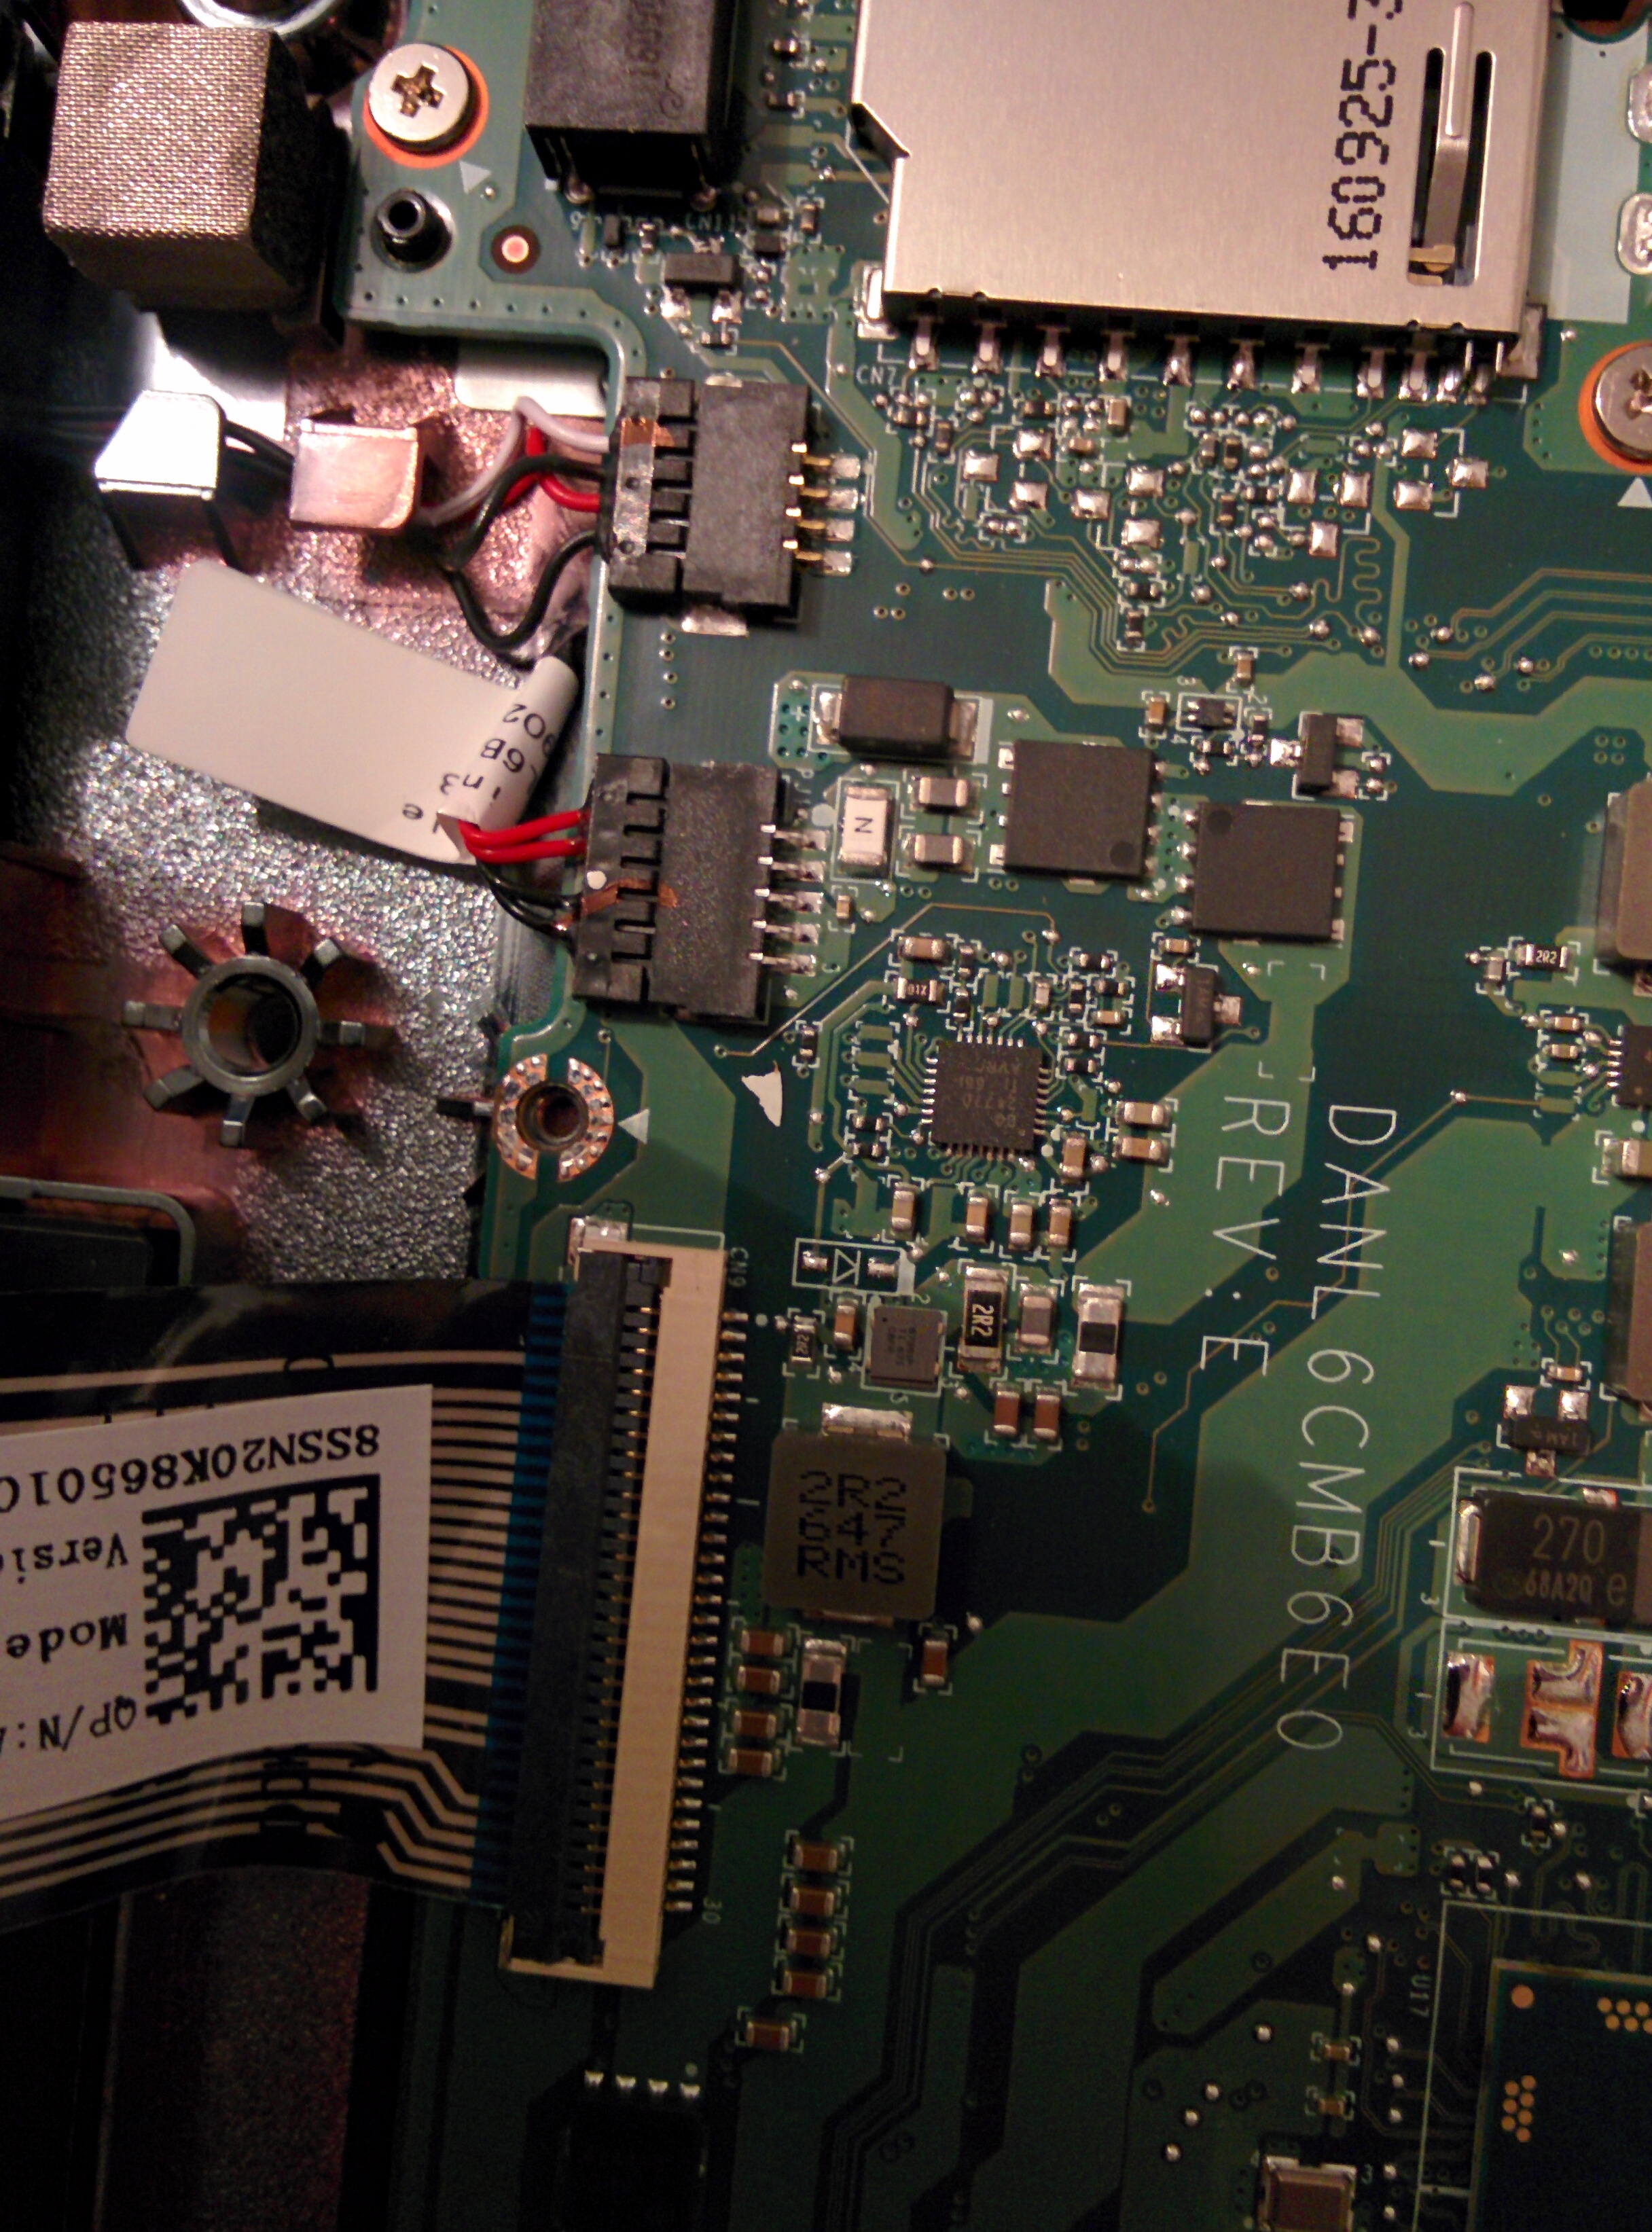
Once the security screw is removed, you should be able to see two metal contacts on either side of the hole. If you do not see any contacts, then you have probably removed the wrong screw. Once this is all done, leave the keyboard off of the computer, since we will have to put the screw back in later.
Install The New BIOS
Now that the security is disabled, we can begin installing the new BIOS. Turn on the computer normally and boot it, then open the browser. Open a command line by hitting Ctrl+T. Then enter the *** shell *** command to begin a full command line session.
Now we will be installing SeaBios as provided by
https://johnlewis.ie/custom-chromebook-firmware/rom-download/
The flash script has been moved and can now be found here: https://gist.github.com/x0x8x/5919d79bc6d9660c37fbebe1f4159fab
From within the regular (non root) terminal enter the following command:
|
Follow the instructions presented on screen. Make sure to install the BIOS in *** RW_LEGACY *** mode.
Once the command has completed. The new bios should be installed correctly. You should now reboot the device. At this point you should not notice anything different. This is just to ensure that the computer can still turn on and that no damage has been done.
Now, open up the terminal just as before. We will first switch to using a root shell by executing:
|
Then we can enable the new BIOS using the following command:
|
Optionally, at this point it may be a good idea to reboot once more. To ensure that the new BIOS is functioning properly. When the computer is booting and the developer mode screen is visible press Ctrl+L to switch to the new BIOS. You should see the word SeaBios at the top of a black screen that is slowly writing out text. If so, everything has gone correctly. Turn off the computer once more and let it boot normally. Return to a terminal like before and switch to a root shell using:
|
The last thing that needs to be done is to enable the new BIOS as default on the device. This is done following the instructions detailed here:https://johnlewis.ie/how-to-make-the-legacy-seabios-firmware-slot-the-default-on-a-haswell-broadwell-based-chromebook/
Navigate to the correct folder and check the current bios flags using the following:
|
Make sure that the flags that were printed on screen match the following:
|
If they are not matching, do not attempting to modify the flags unless you know exactly what you are doing. However they should match and then you can execute the following to change the default BIOS order:
|
Now reboot the computer one final time. This time it should open SeaBios automatically after 1 second. Once this is verified shut off the device. At this point all of the difficult work is completed and your laptop is fully capable of running linux.
Replace Keyboard
Put the security screw back in place. This will make sure that no more changes accidentally damage the new BIOS. Then reassemble the laptop by snapping the top of the case back together. Then put all 10 screws back in place and stick the rubber feet back over the holes. Each foot has a small letter written on the bottom, these letter correspond to letters found in the holes that they were removed from.
Install New Operating System
Finally choose a linux operating system to install onto the device. I have had best results with GalliumOS since it is designed to run on Chromebooks. Feel free to experiment with alternative linux distros, however your milage may vary.
List of possible distros:
Burn the ISO of your choice to a USB stick and install it as you would on a regular laptop. The text will be slow within the BIOS, so be prepared to wait a minute until you can begin to boot your linux live USB. This wont happen once the OS is actually installed.
Congratulations
You have now completed transforming a Chromebook into a full linux laptop. I hope that the process was a success. Enjoy the new device. Please think about donating to John Lewis since without his work this process wouldnt be possible.
31/01/2017